嵌入式开发场景Vibe Coding方案探索
1. 背景
嵌入式开发因其与硬件设备有较大关联,而不同厂商、不同型号的硬件设备编程、调用方式不同,所以嵌入式开发与纯软件开发在使用 AI 辅助编程工具时有较大的差异。此外大语言模型在训练数据时也主要以 Java、Python、JS 等软件开发语言为主,很少使用嵌入式开发项目进行训练,故其生成效果也不如纯软件开发好。这是嵌入式开发在使用 AI 工具时所面临的独特挑战。
那在实际项目中,是否可以通过一些方法在一定程度上解决这一问题?
本文以涂鸦 T5 开发版为例,使用 CodeRider 、Cline、Kilo 等 AI Coding工具,尝试探索嵌入式开发场景的 Vibe Coding 方案。
2. 开发环境
- 开发板:涂鸦 T5 AI Board + 35565 LCD 显示屏
- 开发套件:https://github.com/tuya/TuyaOpen.git
- 操作系统:MacOS 15.6
3. 整体思路
参考《Vibe Coding 屠龙纲要》的实践经验,从面——线——点三方面来提高 Vibe Coding 生成效果,但由于 LLM 本身缺少对特定的嵌入式设备的知识,所以还需有一些示例项目,用于 LLM 作为参考。
基于 TuyaOpen 开发套件开发,需要将套件项目 https://github.com/tuya/TuyaOpen.git 下载到本地,该项目中已经包含如下内容,且相对完整,为方案提供了基础。
-
框架源码
-
示例项目
-
使用文档(仅
READMD.md,其他内容跳转到官网)
3.1. 面:建立项目描述
由于开发套件中只有一个READMD.md作为文档概览,其他文档需要跳转到官网,不利于 LLM 获取,所以基于套件项目,结合官网文档 https://tuyaopen.ai/zh/docs/about-tuyaopen ,需要补全使用文档,在项目docs目录下添加以下文件(点击展开):
-
compilation-guide.md1 2 3 4 5 6 7 8 9 10 11 12 13 14 15 16 17 18 19 20 21 22 23 24 25 26 27 28 29 30 31 32 33 34 35 36 37 38 39 40 41 42 43 44 45 46 47 48 49 50 51 52 53 54 55 56 57 58 59 60 61 62 63 64 65 66 67 68 69 70 71 72 73 74 75 76 77 78 79 80 81 82 83 84 85 86 87 88 89 90 91 92 93 94 95 96 97 98 99 100 101 102 103 104 105 106 107 108 109 110 111 112 113 114 115 116 117 118 119 120 121 122 123 124 125 126 127 128 129 130 131 132 133 134 135 136 137 138 139 140 141 142 143 144 145 146 147 148 149 150 151 152 153 154 155 156 157 158 159 160 161 162 163 164 165 166 167 168 169 170 171 172 173 174 175 176 177 178 179 180 181 182 183 184 185 186 187 188 189 190 191 192 193 194 195 196 197 198 199 200 201 202 203 204 205 206 207 208 209 210 211 212 213 214 215 216 217 218 219 220 221 222 223 224 225 226 227 228 229 230 231 232 233 234 235 236 237 238 239 240 241 242 243 244 245 246 247 248 249 250 251 252 253 254 255 256 257 258 259 260 261 262 263 264 265 266 267 268 269 270 271 272 273 274 275 276 277 278 279 280 281 282 283 284 285 286 287 288 289 290 291 292 293 294 295 296 297 298 299 300 301 302 303 304 305 306 307 308 309 310 311 312 313 314 315 316 317 318 319 320 321 322 323 324 325 326 327 328# TuyaOpen 编译流程详解 ## 概述 本文档详细介绍了 `TuyaOpen` 项目的编译流程,从执行 `tos.py build` 命令开始,到最终生成二进制文件的完整过程 `TuyaOpen` 使用 Python 脚本协调 CMake/Ninja 构建工具,支持多平台、多配置的编译 ## 编译流程架构 ``` tos.py build │ ├── 环境检查 ├── 配置初始化 ├── 平台下载 ├── 平台准备 ├── 构建设置 ├── CMake 配置 ├── Ninja 构建 └── 输出验证 ``` ## 流程说明 ### 1. Config 命令执行 (cli_config.py) 当用户执行 `tos.py config choice` 命令时: 1. **文件替换** 使用用户选择的配置文件替换默认的 `app_default.config` 文件 2. **生成CatalogKconfig** 在 `.build/cache/` 目录下生成 `CatalogKconfig` 文件,包含所有 Kconfig 配置文件 主要包含 `<project>/Kconfig` 、 `src/Kconfig` 和 `boards/Kconfig` 3. **生成using.config文件** 根据 `CatalogKconfig` 提供的配置选项以及 `app_default.config` 文件提供的配置结果 生成 `.build/cache/using.config` 文件 该文件除了包含所有用户选择的代码相关配置信息外,还有一些编译相关的数据,例如:项目名称、版本、平台、开发板等信息 ### 2. Build 命令执行 (cli_build.py) 相关逻辑可阅读文件:`tools/cli_command/cli_build.py` #### 2.1 环境检查 ```python def env_check(): ... ``` 等效命令: ```bash git submodule update --init ``` 确保所有依赖的子模块都已正确更新。 #### 2.2 配置初始化 生成 `.build/cache/using.config` 文件 ```python init_using_config(force=False) ``` 编译需要的主要配置项包括: - `CONFIG_PROJECT_NAME`: 项目名称 - `CONFIG_PLATFORM_CHOICE`: 平台选择 - `CONFIG_CHIP_CHOICE`: 芯片型号 - `CONFIG_BOARD_CHOICE`: 开发板型号 - `CONFIG_FRAMEWORK_CHOICE`: 框架类型 #### 2.3 平台下载 ```python def download_platform(platform): ... ``` 根据项目配置信息以及 `platform/platform_config.yaml` 文件提供的git信息,下载对应的硬件平台代码 平台代码存放在 `platform/` 目录下 等效命令: ```bash git clone <repository_url> <tuyaopen_root>/platform/<platform_name> cd <tuyaopen_root>/platform/<platform_name> git checkout <commit_hash> ``` #### 2.4 平台准备 如果平台代码中存在 `platform_prepare.py` 脚本,则执行该脚本进行平台特定的准备工作: ```python def prepare_platform(platform, chip=""): ... ``` 请在此脚本中完成所需要的编译工具下载,推荐将工具链下载在`platform/tools`目录下 编译前需要的准备工作,例如:配置文件的更新、参数的设置等等,也可以在此脚本中实现 等效命令: ```bash python <tuyaopen_root>/platform/<platform_name>/platform_prepare.py $CHIP ``` #### 2.5 构建设置 如果平台代码中存在 `build_setup.py` 脚本,则执行该脚本进行构建设置: ```python def build_setup(platform, project_name, framework, chip=""): ... ``` 此脚本的作用与 `2.4 平台准备` 中提到的 `platform_prepare.py` 相同,执行时机也相同 所以,只需要存在其中之一即可 *说明:由于TuyaOpen发展的某些历史原因,导致两个脚本会同时生效* 等效命令: ```bash python <tuyaopen_root>/platform/<platform_name>/build_setup.py $PROJ_NAME $PLATFORM $FRAMEWORK $CHIP ``` #### 2.6 CMake 配置 生成 CMake 构建文件: ```python def cmake_configure(using_data, verbose=False): ... ``` `TuyaOpen` 使用 CMake 构建系统,配置文件位于 `<tuyaopen_root>/CMakeLists.txt` 文件中 构建主要步骤见后文 等效命令: ```bash mkdir <project_root>/.build cd <project_root>/.build cmake -G Ninja $CMAKE_VERBOSE $OPEN_SDK_ROOT -DTOS_PROJECT_NAME=$PROJ -DTOS_PROJECT_ROOT=$PROJECT_ROOT -DTOS_PROJECT_PLATFORM=$PROJECT_PLATFORM -DTOS_FRAMEWORK=$PROJECT_FRAMEWORK -DTOS_PROJECT_CHIP=$PROJECT_CHIP -DTOS_PROJECT_BOARD=$PROJECT_BOARD ``` #### 2.7 Ninja 构建 执行实际的编译过程: ```python def ninja_build(build_path, verbose=False): ... ``` 等效命令: ```bash cd <project_root>/.build ninja example ``` #### 2.8 输出验证 执行编译后,验证生成的二进制文件是否符合预期: ```python def check_bin_file(using_data): ... ``` ### 3. CMake 构建系统 (CMakeLists.txt) 主 CMakeLists.txt 文件负责整个项目的构建配置: ``` <tuyaopen_root>/CMakeLists.txt ``` #### 3.1 Kconfig 配置系统 - 使用 Kconfig 管理配置选项 - 包含 `using.cmake` 配置 - 生成 `tuya_kconfig.h` 头文件 #### 3.2 工具链配置 ```cmake include("${PLATFORM_PATH}/toolchain_file.cmake") ``` 配置交叉编译工具链的具体位置,以及通的编译选项 ```cmake include("${PLATFORM_PATH}/platform_config.cmake") ``` 配置应用层使用的头文件路径,根据`TuyaOpen`跨平台的设计,应该仅仅包含`tuyaos_adapter`相关的头文件路径 #### 3.3 组件编译 ```cmake # 编译 src/ 目录下的所有组件 list_components(COMPONENT_LIST "${TOP_SOURCE_DIR}/src") foreach(comp ${COMPONENT_LIST}) add_subdirectory("${TOP_SOURCE_DIR}/src/${comp}") endforeach(comp) # 编译板级代码 if(EXISTS "${TOP_SOURCE_DIR}/boards/${TOS_PROJECT_PLATFORM}/${TOS_PROJECT_BOARD}/CMakeLists.txt") add_subdirectory("${TOP_SOURCE_DIR}/boards/${TOS_PROJECT_PLATFORM}/${TOS_PROJECT_BOARD}") endif() ``` 每个组件可通过 `src/<component_name>/CMakeLists.txt` 文件进行编译配置 板级代码通过 `boards/<platform>/<board>/CMakeLists.txt` 文件进行编译配置 产物:`lib<component_name>.a` #### 3.4 库文件生成 ```cmake # 生成 tuyaos 静态库,包含所有组件 add_library(${COMPONENTS_ALL_LIB} STATIC ${all_need}) ``` 产物:`libtuyaos.a`,包含所有组件的静态库 #### 3.5 应用编译 ```cmake # 编译应用代码 set(EXAMPLE_LIB "tuyaapp") include(${TOS_PROJECT_ROOT}/CMakeLists.txt) target_link_libraries(${EXAMPLE_LIB} ${COMPONENTS_ALL_LIB}) ``` 应用代码通过 `<project_root>/CMakeLists.txt` 文件进行编译配置 产物:`libtuyaapp.a` #### 3.6 平台构建 ```cmake # 调用平台特定的构建脚本 if(EXISTS "${TOP_SOURCE_DIR}/platform/${TOS_PROJECT_PLATFORM}/build_example.py") set(BUILD_COMMAND python -u ./build_example.py) ``` 由于 `TuyaOpen` 支持多平台编译,所有各平台的编译逻辑都可以通过 `platform/<platform_name>/build_example.py` 文件进行实现 脚本的主要作用参考:[build_example.py](https://tuyaopen.ai/zh/docs/new-hardware/new-platform#编译和链接) ### 4. 关键文件和目录结构 ``` TuyaOpen/ ├── tos.py # 主入口脚本 ├── tools/ │ ├── cli_command/ # CLI 命令实现 │ │ ├── cli_build.py # build 命令实现 │ │ ├── cli_config.py # config 命令实现 │ │ ├── util.py # 工具函数 │ │ └── ... │ ├── cmake/ # CMake 相关文件 │ └── kconfiglib/ # Kconfig 工具 ├── platform/ # 平台代码目录 │ ├── platform_config.yaml # 平台配置 │ └── [platform_name]/ # 具体平台 ├── src/ # 源代码组件 ├── boards/ # 板级支持包 └── [project]/ # 用户项目目录 ├── CMakeLists.txt # 项目 CMake 文件 ├── app_default.config # 默认配置 └── .build/ # 构建输出目录 ├── bin/ # 二进制文件 ├── lib/ # 库文件 └── cache/ # 配置缓存 ``` ### 5. 编译输出 成功编译后,会在以下位置生成文件: - **二进制文件**: `.build/bin/{app_name}_QIO_{version}.bin` - **库文件**: `.build/lib/` - **构建参数**: `.build/build/build_param` 输出信息示例: ``` ====================[ BUILD SUCCESS ]=================== Target : example_QIO_1.0.0.bin Output : /path/to/project/.build/bin Platform : T2 Chip : T2-U Board : t2_evb Framework : base ======================================================== ``` ## 总结 TuyaOpen 的编译系统通过 Python 脚本协调 CMake/Ninja 构建工具,实现了: 1. **多平台支持**: 通过平台抽象层支持不同硬件平台 2. **配置管理**: 使用 Kconfig 系统管理配置选项 3. **模块化设计**: 组件化的源代码结构 4. **自动化构建**: 一键编译,自动处理依赖 整个流程设计清晰,便于扩展和维护,适合 IoT 设备的跨平台开发。 -
enviroment-setup.md1 2 3 4 5 6 7 8 9 10 11 12 13 14 15 16 17 18 19 20 21 22 23 24 25 26 27 28 29 30 31 32 33 34 35 36 37 38 39 40 41 42 43 44 45 46 47 48 49 50 51 52 53 54 55 56 57 58 59 60 61 62 63 64 65 66 67 68 69 70 71 72 73 74 75 76 77 78 79 80 81 82 83 84 85 86 87 88 89 90 91 92 93 94 95 96 97 98 99 100 101 102 103 104 105 106# 环境搭建 ## 概述 完成在不同系统(Linux、Windows、macOS)中的必要工具准备。 ## 硬件准备 开始前,请准备以下资源: - TuyaOpen [支持的开发板或模组](https://tuyaopen.ai/zh/docs/hardware-specific/#硬件平台) - USB 数据线 - 电脑(支持 Windows/Linux/macOS 系统) ## 环境准备 🐧 Ubuntu and Debian⌘ Mac🖥️ Windows 推荐使用 Ubuntu24/22/20 的 LTS 版本。 安装必要的工具: ```bash sudo apt-get install lcov cmake-curses-gui build-essential ninja-build wget git python3 python3-pip python3-venv libc6-i386 libsystemd-dev ``` ## 下载并激活 TuyaOpen 下载 `TuyaOpen` 仓库: 可适当调整git配置以提高性能: ```bash git config --global http.postBuffer 524288000 ``` 选择项目路径的时候,不使用中文,也不要包含空格等特殊字符,Windows环境不要选择C盘。 ```bash # 使用 github git clone https://github.com/tuya/TuyaOpen.git # 或者使用 gitee git clone https://gitee.com/tuya-open/TuyaOpen.git # 进入项目 cd TuyaOpen ``` 激活 `tos.py`: 每次重新打开终端后,需要重新激活 `tos.py`。 🐧 Linux⌘ Mac🖥️ Windows ```bash . ./export.sh ``` 验证,使用命令 `tos.py version` 以及 `tos.py check`,会出现如下信息: ```bash ❯ tos.py version [INFO]: Running tos.py ... [INFO]: v1.3.0 ❯ tos.py check [INFO]: Running tos.py ... [INFO]: [git] (2.43.0 >= 2.0.0) is ok. [INFO]: [cmake] (4.0.2 >= 3.28.0) is ok. [INFO]: [make] (4.3 >= 3.0.0) is ok. [INFO]: [ninja] (1.11.1 >= 1.6.0) is ok. [INFO]: Downloading submoudules ... [INFO]: [do subprocess]: cd /home/huatuo/work/open/TuyaOpen && git submodule update --init [INFO]: Download submoudules successfully. ``` <details style="box-sizing: border-box; --tw-border-spacing-x: 0; --tw-border-spacing-y: 0; --tw-translate-x: 0; --tw-translate-y: 0; --tw-rotate: 0; --tw-skew-x: 0; --tw-skew-y: 0; --tw-scale-x: 1; --tw-scale-y: 1; --tw-pan-x: ; --tw-pan-y: ; --tw-pinch-zoom: ; --tw-scroll-snap-strictness: proximity; --tw-gradient-from-position: ; --tw-gradient-via-position: ; --tw-gradient-to-position: ; --tw-ordinal: ; --tw-slashed-zero: ; --tw-numeric-figure: ; --tw-numeric-spacing: ; --tw-numeric-fraction: ; --tw-ring-inset: ; --tw-ring-offset-width: 0px; --tw-ring-offset-color: #fff; --tw-ring-color: #3b82f680; --tw-ring-offset-shadow: 0 0 #0000; --tw-ring-shadow: 0 0 #0000; --tw-shadow: 0 0 #0000; --tw-shadow-colored: 0 0 #0000; --tw-blur: ; --tw-brightness: ; --tw-contrast: ; --tw-grayscale: ; --tw-hue-rotate: ; --tw-invert: ; --tw-saturate: ; --tw-sepia: ; --tw-drop-shadow: ; --tw-backdrop-blur: ; --tw-backdrop-brightness: ; --tw-backdrop-contrast: ; --tw-backdrop-grayscale: ; --tw-backdrop-hue-rotate: ; --tw-backdrop-invert: ; --tw-backdrop-opacity: ; --tw-backdrop-saturate: ; --tw-backdrop-sepia: ; --tw-contain-size: ; --tw-contain-layout: ; --tw-contain-paint: ; --tw-contain-style: ; color: rgb(227, 227, 227); font-family: "Open Sans", -apple-system, "system-ui", "Segoe UI", "Noto Sans", Helvetica, Arial, sans-serif, "Apple Color Emoji", "Segoe UI Emoji"; font-size: 16px; font-style: normal; font-variant-ligatures: normal; font-variant-caps: normal; font-weight: 400; letter-spacing: normal; orphans: 2; text-align: start; text-indent: 0px; text-transform: none; widows: 2; word-spacing: 0px; -webkit-text-stroke-width: 0px; white-space: normal; background-color: rgb(27, 27, 29); text-decoration-thickness: initial; text-decoration-style: initial; text-decoration-color: initial;"><summary style="box-sizing: border-box; --tw-border-spacing-x: 0; --tw-border-spacing-y: 0; --tw-translate-x: 0; --tw-translate-y: 0; --tw-rotate: 0; --tw-skew-x: 0; --tw-skew-y: 0; --tw-scale-x: 1; --tw-scale-y: 1; --tw-pan-x: ; --tw-pan-y: ; --tw-pinch-zoom: ; --tw-scroll-snap-strictness: proximity; --tw-gradient-from-position: ; --tw-gradient-via-position: ; --tw-gradient-to-position: ; --tw-ordinal: ; --tw-slashed-zero: ; --tw-numeric-figure: ; --tw-numeric-spacing: ; --tw-numeric-fraction: ; --tw-ring-inset: ; --tw-ring-offset-width: 0px; --tw-ring-offset-color: #fff; --tw-ring-color: #3b82f680; --tw-ring-offset-shadow: 0 0 #0000; --tw-ring-shadow: 0 0 #0000; --tw-shadow: 0 0 #0000; --tw-shadow-colored: 0 0 #0000; --tw-blur: ; --tw-brightness: ; --tw-contrast: ; --tw-grayscale: ; --tw-hue-rotate: ; --tw-invert: ; --tw-saturate: ; --tw-sepia: ; --tw-drop-shadow: ; --tw-backdrop-blur: ; --tw-backdrop-brightness: ; --tw-backdrop-contrast: ; --tw-backdrop-grayscale: ; --tw-backdrop-hue-rotate: ; --tw-backdrop-invert: ; --tw-backdrop-opacity: ; --tw-backdrop-saturate: ; --tw-backdrop-sepia: ; --tw-contain-size: ; --tw-contain-layout: ; --tw-contain-paint: ; --tw-contain-style: ;">若 check 命令失败:</summary><pre style="box-sizing: border-box; background-color: rgba(255, 255, 255, 0.1); border-radius: 6.4px; color: rgb(227, 227, 227); font: 400 14.4px / 1.45 SFMono-Regular, Menlo, Monaco, Consolas, "Liberation Mono", "Courier New", monospace; margin: 0px 0px 16px; padding: 16px; overflow: auto; --tw-border-spacing-x: 0; --tw-border-spacing-y: 0; --tw-translate-x: 0; --tw-translate-y: 0; --tw-rotate: 0; --tw-skew-x: 0; --tw-skew-y: 0; --tw-scale-x: 1; --tw-scale-y: 1; --tw-pan-x: ; --tw-pan-y: ; --tw-pinch-zoom: ; --tw-scroll-snap-strictness: proximity; --tw-gradient-from-position: ; --tw-gradient-via-position: ; --tw-gradient-to-position: ; --tw-ordinal: ; --tw-slashed-zero: ; --tw-numeric-figure: ; --tw-numeric-spacing: ; --tw-numeric-fraction: ; --tw-ring-inset: ; --tw-ring-offset-width: 0px; --tw-ring-offset-color: #fff; --tw-ring-color: #3b82f680; --tw-ring-offset-shadow: 0 0 #0000; --tw-ring-shadow: 0 0 #0000; --tw-shadow: 0 0 #0000; --tw-shadow-colored: 0 0 #0000; --tw-blur: ; --tw-brightness: ; --tw-contrast: ; --tw-grayscale: ; --tw-hue-rotate: ; --tw-invert: ; --tw-saturate: ; --tw-sepia: ; --tw-drop-shadow: ; --tw-backdrop-blur: ; --tw-backdrop-brightness: ; --tw-backdrop-contrast: ; --tw-backdrop-grayscale: ; --tw-backdrop-hue-rotate: ; --tw-backdrop-invert: ; --tw-backdrop-opacity: ; --tw-backdrop-saturate: ; --tw-backdrop-sepia: ; --tw-contain-size: ; --tw-contain-layout: ; --tw-contain-paint: ; --tw-contain-style: ;"><code class="language-bash" style="box-sizing: border-box; background-color: rgba(0, 0, 0, 0); border-radius: 6.4px; font-family: SFMono-Regular, Menlo, Monaco, Consolas, "Liberation Mono", "Courier New", monospace; font-size: 14.4px; padding: 0px; vertical-align: middle; border: none; line-height: inherit; --tw-border-spacing-x: 0; --tw-border-spacing-y: 0; --tw-translate-x: 0; --tw-translate-y: 0; --tw-rotate: 0; --tw-skew-x: 0; --tw-skew-y: 0; --tw-scale-x: 1; --tw-scale-y: 1; --tw-pan-x: ; --tw-pan-y: ; --tw-pinch-zoom: ; --tw-scroll-snap-strictness: proximity; --tw-gradient-from-position: ; --tw-gradient-via-position: ; --tw-gradient-to-position: ; --tw-ordinal: ; --tw-slashed-zero: ; --tw-numeric-figure: ; --tw-numeric-spacing: ; --tw-numeric-fraction: ; --tw-ring-inset: ; --tw-ring-offset-width: 0px; --tw-ring-offset-color: #fff; --tw-ring-color: #3b82f680; --tw-ring-offset-shadow: 0 0 #0000; --tw-ring-shadow: 0 0 #0000; --tw-shadow: 0 0 #0000; --tw-shadow-colored: 0 0 #0000; --tw-blur: ; --tw-brightness: ; --tw-contrast: ; --tw-grayscale: ; --tw-hue-rotate: ; --tw-invert: ; --tw-saturate: ; --tw-sepia: ; --tw-drop-shadow: ; --tw-backdrop-blur: ; --tw-backdrop-brightness: ; --tw-backdrop-contrast: ; --tw-backdrop-grayscale: ; --tw-backdrop-hue-rotate: ; --tw-backdrop-invert: ; --tw-backdrop-opacity: ; --tw-backdrop-saturate: ; --tw-backdrop-sepia: ; --tw-contain-size: ; --tw-contain-layout: ; --tw-contain-paint: ; --tw-contain-style: ;"></code></pre></details> 使用如下命令退出激活 `tos.py`: 🐧 Linux⌘ Mac🖥️ Windows ```bash deactivate ``` 关于 `tos.py` 更详细的说明方法,可使用命令 `tos.py --help` 进行查看,或参考 [tos.py 工具使用](https://tuyaopen.ai/zh/docs/tos-tools/tos-guide)。 ## 常见问题 ### `tos.py` 激活失败 - 如果激活失败,可能是因为没有安装 `python3-venv`,请安装后重新激活。 ```bash sudo apt-get install python3-venv ``` - `tos.py` 激活时会自动创建 `./.venv` 目录。如果激活失败,需要删除 `./.venv` 目录,并重新激活。 -
equipment-authorization.md1 2 3 4 5 6 7 8 9 10 11 12 13 14 15 16 17 18 19 20 21 22 23 24 25 26 27 28 29 30 31 32 33 34 35 36 37 38 39 40 41 42 43 44 45 46 47 48 49 50 51 52 53 54 55 56 57 58# 授权 ## 概述 如需了解关于授权码的概念,请查看 [授权码说明](https://tuyaopen.ai/zh/docs/quick-start/#tuyaopen-专用授权码)。 您可以使用以下两种授权方式: - 授权命令 - 修改头文件 ## 授权命令 1. 使用命令 `tos.py monitor -b 115200`。 这里选择烧录时使用的串口号。 2. 输入交互命令,使用 `auth` 并回车,可以得到如下信息: ```bash [INFO]: Run Tuya Uart Tool. -------------------- 1. /dev/ttyACM1 2. /dev/ttyACM0 -------------------- Select serial port: 2 [INFO]: Open Monitor. (Quit: Ctrl+c) auth auth Use like: auth uuidxxxxxxxxxxxxxxxx keyxxxxxxxxxxxxxxxxxxxxxxxxxxxxx tuya> ``` 3. 根据提示使用 `auth`,写入 `uuid` 和 `authkey`。 ```bash tuya> auth uuid9f6a6xxxxxxxxxxx cGuDnU2YxjHJldjxxxxxxxxxxxxxxxxx auth uuid9f6a6xxxxxxxxxxx cGuDnU2YxjHJldjxxxxxxxxxxxxxxxxx Authorization write succeeds. ``` 4. 操作成功后,需要重启设备,重启后授权信息生效。 若设备不支持授权命令,请参考下文通过修改头文件的方式来配置授权信息。 ## 修改头文件 1. 首先,在项目路径中找到 `tuya_config.h` 文件。所选的项目不同,文件所在目录可能有差异(`src` 或 `include`)。 2. 修改文件中授权信息的配置,如下: ```c++ #define TUYA_OPENSDK_UUID "uuidxxxxxxxxxxxxxxxx" // Please change the correct uuid #define TUYA_OPENSDK_AUTHKEY "keyxxxxxxxxxxxxxxxxxxxxxxxxxxxxx" // Please change the correct authkey ``` 3. 重新编译、烧录,然后启动设备。 -
firmware-burning.md1 2 3 4 5 6 7 8 9 10 11 12 13 14 15 16 17 18 19 20 21 22 23 24 25 26 27 28 29 30 31 32 33 34 35 36 37 38 39 40 41 42 43 44 45 46 47 48 49 50 51 52 53 54 55 56 57 58 59 60 61 62 63 64 65 66 67 68 69 70 71 72 73 74 75 76 77 78 79 80 81 82 83 84 85 86 87 88 89 90 91 92# 烧录和日志 ## 烧录 将设备与 PC 连接,若使用虚拟机,请将串口映射到虚拟机中。 对于 Linux/Mac 用户,需要执行命令 `sudo usermod -aG dialout $USER` 开启串口使用权限,并重启系统。 使用命令 `tos.py flash` 烧录固件,并选择烧录口。若有多个串口可以依次尝试。 ```bash ❯ tos.py flash [INFO]: Run Tuya Uart Tool. [INFO]: Use default baudrate: [921600] [INFO]: Use default start address: [0x00] -------------------- 1. /dev/ttyACM1 2. /dev/ttyACM0 -------------------- Select serial port: 2 [INFO]: Waiting Reset ... [INFO]: unprotect flash OK. [INFO]: sync baudrate 921600 success Erasing: ━━━━━━━━━━━━━━━━━━━━━━━━━━━━━━━━━━━━━━━━ 100% 5 bytes/s 0:00:07 / 0:00:00 [INFO]: Erase flash success Writing: ━━━━━━━━━━━━━━━━━━━━━━━━━━━━━━━━━━━━━━━╸ 100% 12 bytes/s ⠸ 0:00:38 / 0:00:01 [INFO]: Write flash success [INFO]: CRC check success [INFO]: Reboot done [INFO]: Flash write success. ``` <details style="box-sizing: border-box; --tw-border-spacing-x: 0; --tw-border-spacing-y: 0; --tw-translate-x: 0; --tw-translate-y: 0; --tw-rotate: 0; --tw-skew-x: 0; --tw-skew-y: 0; --tw-scale-x: 1; --tw-scale-y: 1; --tw-pan-x: ; --tw-pan-y: ; --tw-pinch-zoom: ; --tw-scroll-snap-strictness: proximity; --tw-gradient-from-position: ; --tw-gradient-via-position: ; --tw-gradient-to-position: ; --tw-ordinal: ; --tw-slashed-zero: ; --tw-numeric-figure: ; --tw-numeric-spacing: ; --tw-numeric-fraction: ; --tw-ring-inset: ; --tw-ring-offset-width: 0px; --tw-ring-offset-color: #fff; --tw-ring-color: #3b82f680; --tw-ring-offset-shadow: 0 0 #0000; --tw-ring-shadow: 0 0 #0000; --tw-shadow: 0 0 #0000; --tw-shadow-colored: 0 0 #0000; --tw-blur: ; --tw-brightness: ; --tw-contrast: ; --tw-grayscale: ; --tw-hue-rotate: ; --tw-invert: ; --tw-saturate: ; --tw-sepia: ; --tw-drop-shadow: ; --tw-backdrop-blur: ; --tw-backdrop-brightness: ; --tw-backdrop-contrast: ; --tw-backdrop-grayscale: ; --tw-backdrop-hue-rotate: ; --tw-backdrop-invert: ; --tw-backdrop-opacity: ; --tw-backdrop-saturate: ; --tw-backdrop-sepia: ; --tw-contain-size: ; --tw-contain-layout: ; --tw-contain-paint: ; --tw-contain-style: ; color: rgb(227, 227, 227); font-family: "Open Sans", -apple-system, "system-ui", "Segoe UI", "Noto Sans", Helvetica, Arial, sans-serif, "Apple Color Emoji", "Segoe UI Emoji"; font-size: 16px; font-style: normal; font-variant-ligatures: normal; font-variant-caps: normal; font-weight: 400; letter-spacing: normal; orphans: 2; text-align: start; text-indent: 0px; text-transform: none; widows: 2; word-spacing: 0px; -webkit-text-stroke-width: 0px; white-space: normal; background-color: rgb(27, 27, 29); text-decoration-thickness: initial; text-decoration-style: initial; text-decoration-color: initial;"><summary style="box-sizing: border-box; --tw-border-spacing-x: 0; --tw-border-spacing-y: 0; --tw-translate-x: 0; --tw-translate-y: 0; --tw-rotate: 0; --tw-skew-x: 0; --tw-skew-y: 0; --tw-scale-x: 1; --tw-scale-y: 1; --tw-pan-x: ; --tw-pan-y: ; --tw-pinch-zoom: ; --tw-scroll-snap-strictness: proximity; --tw-gradient-from-position: ; --tw-gradient-via-position: ; --tw-gradient-to-position: ; --tw-ordinal: ; --tw-slashed-zero: ; --tw-numeric-figure: ; --tw-numeric-spacing: ; --tw-numeric-fraction: ; --tw-ring-inset: ; --tw-ring-offset-width: 0px; --tw-ring-offset-color: #fff; --tw-ring-color: #3b82f680; --tw-ring-offset-shadow: 0 0 #0000; --tw-ring-shadow: 0 0 #0000; --tw-shadow: 0 0 #0000; --tw-shadow-colored: 0 0 #0000; --tw-blur: ; --tw-brightness: ; --tw-contrast: ; --tw-grayscale: ; --tw-hue-rotate: ; --tw-invert: ; --tw-saturate: ; --tw-sepia: ; --tw-drop-shadow: ; --tw-backdrop-blur: ; --tw-backdrop-brightness: ; --tw-backdrop-contrast: ; --tw-backdrop-grayscale: ; --tw-backdrop-hue-rotate: ; --tw-backdrop-invert: ; --tw-backdrop-opacity: ; --tw-backdrop-saturate: ; --tw-backdrop-sepia: ; --tw-contain-size: ; --tw-contain-layout: ; --tw-contain-paint: ; --tw-contain-style: ;">若出现<span> </span><code style="box-sizing: border-box; background-color: rgba(255, 255, 255, 0.1); border-radius: 6.4px; font-family: SFMono-Regular, Menlo, Monaco, Consolas, "Liberation Mono", "Courier New", monospace; font-size: 14.4px; padding: 1.6px; vertical-align: middle; border: 0.1rem solid rgba(0, 0, 0, 0.1); --tw-border-spacing-x: 0; --tw-border-spacing-y: 0; --tw-translate-x: 0; --tw-translate-y: 0; --tw-rotate: 0; --tw-skew-x: 0; --tw-skew-y: 0; --tw-scale-x: 1; --tw-scale-y: 1; --tw-pan-x: ; --tw-pan-y: ; --tw-pinch-zoom: ; --tw-scroll-snap-strictness: proximity; --tw-gradient-from-position: ; --tw-gradient-via-position: ; --tw-gradient-to-position: ; --tw-ordinal: ; --tw-slashed-zero: ; --tw-numeric-figure: ; --tw-numeric-spacing: ; --tw-numeric-fraction: ; --tw-ring-inset: ; --tw-ring-offset-width: 0px; --tw-ring-offset-color: #fff; --tw-ring-color: #3b82f680; --tw-ring-offset-shadow: 0 0 #0000; --tw-ring-shadow: 0 0 #0000; --tw-shadow: 0 0 #0000; --tw-shadow-colored: 0 0 #0000; --tw-blur: ; --tw-brightness: ; --tw-contrast: ; --tw-grayscale: ; --tw-hue-rotate: ; --tw-invert: ; --tw-saturate: ; --tw-sepia: ; --tw-drop-shadow: ; --tw-backdrop-blur: ; --tw-backdrop-brightness: ; --tw-backdrop-contrast: ; --tw-backdrop-grayscale: ; --tw-backdrop-hue-rotate: ; --tw-backdrop-invert: ; --tw-backdrop-opacity: ; --tw-backdrop-saturate: ; --tw-backdrop-sepia: ; --tw-contain-size: ; --tw-contain-layout: ; --tw-contain-paint: ; --tw-contain-style: ;">Port [xxx] may be busy</code><span> </span>提示:</summary><p style="box-sizing: border-box; margin: 0px 0px 20px; --tw-border-spacing-x: 0; --tw-border-spacing-y: 0; --tw-translate-x: 0; --tw-translate-y: 0; --tw-rotate: 0; --tw-skew-x: 0; --tw-skew-y: 0; --tw-scale-x: 1; --tw-scale-y: 1; --tw-pan-x: ; --tw-pan-y: ; --tw-pinch-zoom: ; --tw-scroll-snap-strictness: proximity; --tw-gradient-from-position: ; --tw-gradient-via-position: ; --tw-gradient-to-position: ; --tw-ordinal: ; --tw-slashed-zero: ; --tw-numeric-figure: ; --tw-numeric-spacing: ; --tw-numeric-fraction: ; --tw-ring-inset: ; --tw-ring-offset-width: 0px; --tw-ring-offset-color: #fff; --tw-ring-color: #3b82f680; --tw-ring-offset-shadow: 0 0 #0000; --tw-ring-shadow: 0 0 #0000; --tw-shadow: 0 0 #0000; --tw-shadow-colored: 0 0 #0000; --tw-blur: ; --tw-brightness: ; --tw-contrast: ; --tw-grayscale: ; --tw-hue-rotate: ; --tw-invert: ; --tw-saturate: ; --tw-sepia: ; --tw-drop-shadow: ; --tw-backdrop-blur: ; --tw-backdrop-brightness: ; --tw-backdrop-contrast: ; --tw-backdrop-grayscale: ; --tw-backdrop-hue-rotate: ; --tw-backdrop-invert: ; --tw-backdrop-opacity: ; --tw-backdrop-saturate: ; --tw-backdrop-sepia: ; --tw-contain-size: ; --tw-contain-layout: ; --tw-contain-paint: ; --tw-contain-style: ;"></p></details> ## 日志 使用命令 `tos.py monitor` 查看日志,并选择日志口。 如需查看完整日志,可在命令后,手动复位设备。 ```bash ❯ tos.py monitor [INFO]: Run Tuya Uart Tool. -------------------- 1. /dev/ttyACM1 2. /dev/ttyACM0 -------------------- Select serial port: 1 [INFO]: Open Monitor. (Quit: Ctrl+c) [01-01 00:03:25 ty D][tuya_health.c:75] feed watchdog [01-01 00:03:35 ty D][tuya_health.c:75] feed watchdog [01-01 00:03:45 ty D][tuya_health.c:75] feed watchdog [01-01 00:03:55 ty D][tuya_health.c:75] feed watchdog ``` 如需退出日志查看,按键 `Ctrl + C` 并回车。 ```bash ^C[INFO]: Press "Entry" ... [INFO]: Monitor exit. ``` ## 常见问题 ### 烧录失败 请参考 [安装对应驱动](https://tuyaopen.ai/zh/docs/tos-tools/tools-tyutool#烧录过程中总是在write时失败)。 ### T5系列映射虚拟机有延时 T5系列的开发板在虚拟机中映射串口时,可能会出现一定的延时。 现象是,映射后,使用命令`ls /dev/tty*`,可以看到设备,但是使用时会有`device busy`的提示, 一分钟左右可正常使用。 ### 板子链接电脑会有两个串口号 T5系列的开发板会有两个串口号,一个是烧录用的,一个是日志用的。 在Windows中,可在设备管理列表中查看设备名称,名称中带有编号A的为下载口,带有编号B的为日志口。 在Linux或Mac系统中,一般设备号较小的是烧录口,较大的为日志口。 如果不能确定,可以在烧录固件时,两个串口都测试一下。 ### GUI版本的烧录工具在Windows中被识别为病毒软件 可将`tyutool_gui`工具放在非系统盘(如D盘)下,并将目录添加到`Windows安中心-病毒和防护`设置中的`排除项`中。 -
project-compilation.md1 2 3 4 5 6 7 8 9 10 11 12 13 14 15 16 17 18 19 20 21 22 23 24 25 26 27 28 29 30 31 32 33 34 35 36 37 38 39 40 41 42 43 44 45 46 47 48 49 50 51 52 53 54 55 56 57 58 59 60 61 62 63 64 65 66 67 68 69 70 71 72 73 74# 项目编译 ## 选择项目 TuyaOpen 中,可编译项目可在 `apps`、`example` 中进行选择。 这里以 `switch_demo` 为例。首先,进入项目目录。 ```bash cd apps/tuya_cloud/switch_demo ``` ## 配置项目 使用命令 `tos.py config choice` 对项目进行配置。 该命令会提供已经验证过的配置选项,您可根据自己的硬件设备进行选择。 ```bash ❯ tos.py config choice [INFO]: Running tos.py ... [INFO]: Fullclean success. -------------------- 1. LN882H.config 2. EWT103-W15.config 3. Ubuntu.config 4. ESP32-C3.config 5. ESP32-S3.config 6. ESP32.config 7. T3.config 8. T5AI.config 9. T2.config 10. BK7231X.config -------------------- Input "q" to exit. Choice config file: ``` 这里以涂鸦 T5 系列开发板为例,需要选择 `T5AI.config`。 ## 编译产物 编译项目,使用命令 `tos.py build`。 ```bash ❯ tos.py build ... [INFO]: ****************************** [INFO]: /xxx/TuyaOpen/apps/tuya_cloud/switch_demo/.build/bin/switch_demo_QIO_1.0.0.bin [INFO]: ****************************** [INFO]: ******* Build Success ******** [INFO]: ****************************** ``` ## 清理产物 清理编译缓存,使用命令 `tos.py clean` 或 `tos.py clean -f`(深度清理)。 ```bash ❯ tos.py clean -f [INFO]: Running tos.py ... [INFO]: Fullclean success. ``` ## 常见问题 ### 在Windows环境中编译缓慢 现象是每个文件的编译速度可能长达3s左右,有时甚至会卡在某个文件。 解决办法: 1. 可通过`Ctrl + Shift + Esc`打开任务管理器,查看CPU的进程,找到`MSPCManagerService`进程,并关闭; 2. 如果上述方法仍不见效,可将整个`TuyaOpen`目录放在非系统盘(如D盘)下,并将目录添加到`Windows安中心-病毒和防护`设置中的`排除项`中。-
-
project-walkthrough.md1 2 3 4 5 6 7 8 9 10 11 12 13 14 15 16 17 18 19 20 21 22 23 24 25 26 27 28 29 30 31 32 33 34 35 36 37 38 39 40 41 42 43 44 45 46 47 48 49 50 51 52 53 54 55 56 57 58 59 60 61 62 63 64 65 66 67 68 69 70 71 72 73 74 75 76 77 78 79 80 81 82 83 84 85 86 87 88 89 90 91 92 93 94 95 96 97 98 99 100 101 102 103 104 105 106 107 108 109 110 111 112 113 114 115 116 117 118 119 120 121 122 123 124 125 126 127 128 129 130 131 132 133 134 135 136 137 138 139 140 141# TuyaOpen 目录结构 ## 概述 本文介绍 `TuyaOpen` 的目录结构及作用。 主要目录展示: ``` . ├── apps │ ├── tuya.ai │ └── tuya_cloud ├── boards ├── CMakeLists.txt ├── Dockerfile ├── examples ├── export.bat ├── export.sh ├── LICENSE ├── platform │ └── platform_config.yaml ├── README.md ├── requirements.txt ├── src ├── tools │ ├── cli_command │ ├── cmake │ ├── kconfiglib │ └── tyutool └── tos.py ``` ## `src` 核心源代码的主要存放位置,包含了框架的基础功能实现、核心模块以及跨平台的通用代码。 主要内容包括: - 基础组件与服务: - 系统内核:包含任务调度、内存管理、线程同步(互斥锁、信号量)等操作系统基础功能。 - 设备管理:实现设备初始化、状态管理、资源分配等核心逻辑,例如设备注册、配置加载等。 - 通信协议栈:封装蓝牙、Wi-Fi、MQTT、HTTP 等通信协议的上层接口,为应用提供统一的网络通信能力。 - 跨平台抽象层: - 硬件无关接口:定义与硬件解耦的 `API`,通过调用 `platform` 目录下的驱动实现具体功能。 - 操作系统抽象:提供跨操作系统的接口(如线程创建、定时器管理),确保框架可在不同 OS(如 Linux、RTOS)上运行。 主要组成包括: ``` src/ ├── base/ # 基础工具库(如日志、内存操作、数据结构) ├── device/ # 设备管理核心代码 ├── network/ # 网络通信模块(Wi-Fi、蓝牙、MQTT等) ├── security/ # 安全加密模块(设备认证、数据加密) ├── ai/ # AI 功能接口(语音识别、图像分析) ├── cloud/ # 云端对接服务(Tuya 云 API 调用) └── utils/ # 通用工具函数 ``` ## `apps` 和 `examples` 均为工程项目的存放路径,其中: - `apps` 中复杂应用项目,分为 AI 应用 `tuya.ai` 和 IoT 应用 `tuya_cloud`。 - `examples` 中为单一功能的 Demo 例程,如 Wi-Fi、蓝牙、按键等。 ## `app_default.config` `TuyaOpen` 的配置文件,用于配置项目编译参数。 `app_default.config` 文件只会保存 **最小配置项**,也就是只保留与默认值不同的配置内容。 主要作用: - 编译参数配置: - 目标平台定义:记录当前项目编译的目标平台/开发板(如 T5AI、ESP32),决定加载的硬件驱动和编译工具链。 - 编译选项控制:包含编译器标志(如优化等级、宏定义)、固件版本号、存储分区配置等。 - 硬件资源配置: - 外设参数:定义硬件接口的参数(如串口波特率、GPIO 引脚分配、SPI 通信速率)。 - 内存布局:配置固件在 Flash 中的存储地址、RAM 分配等内存相关参数。 - 功能模块开关: - 组件启用/禁用:控制项目中是否包含特定功能模块(如蓝牙、Wi-Fi、AI 服务),避免冗余代码。 - 功能选项配置:如是否启用 OTA 升级功能。 ## `platform` 和 `platform_config.yaml` `platform` 文件保存工具链仓库,各仓库需要实现: - 硬件抽象层(HAL): 针对不同芯片架构(如 `ESP32`、`BK7231N`、`T5AI` 等)的底层驱动实现,抽象了硬件细节(如 `GPIO`、`UART`、`SPI`、`蓝牙/Wi-Fi` 协议栈等),使上层应用无需关心具体硬件差异。 - 统一 API: 通过定义标准化接口(如 `hal_gpio_read()`、`hal_uart_send()`),使上层代码(如 `app` 文件夹中的应用逻辑)能够以相同方式调用不同硬件的功能。 - 由于工具链仓库占用空间较大,只有项目配置用到时,才会下载对应工具链。 - 下载工具链需要的 `git` 相关信息,被记录在 `platform_config.yaml` 文件中。 ## `boards` `boards` 文件夹主要用于存放与开发板相关的配置文件和支持代码,其核心作用是适配不同硬件平台,确保 TuyaOpen 框架能在多种开发板上正常运行。以下是该文件夹的具体功能和内容说明: - 配置文件: 使用 `Kconfig` 文件,将芯片或开发板的可配置功能和部分编译参数提供给开发者配置,在使用命令 `tos config menu` 时,会自动加载并显示。 - 目标选择: `boards` 文件夹内包含各开发板的配置文件(如 `T2.config`、`T3.config` 等),定义了目标开发板的硬件参数(如串口波特率、引脚分配、内存布局等)。这些配置会在编译时被 `tos.py config choice` 命令选择。 - 硬件适配: 针对不同芯片(如 T2、T3、T5AI、ESP32 等),`boards` 可能提供部分底层驱动适配代码或编译脚本,确保框架与硬件外设(如 UART、GPIO、SPI 等)正确交互。 ## `tos.py` 和 `export.sh` - `tos.py` 是一个核心命令行工具,用于简化开发流程、管理项目配置和执行编译部署等操作。详细使用说明可参考:[`tos.py` 使用](https://tuyaopen.ai/zh/docs/tos-tools/tos-guide)。 - `export.sh` 和 `export.bat` 用于激活 `tos.py` 的命令行功能。 ## `tools` 存放开发、编译、测试和部署过程中使用的工具脚本、辅助程序及配置文件。 - 编译与构建工具: - 项目构建脚本:包含用于编译固件、生成二进制文件的脚本(如 Makefile、CMakeLists.txt 或自定义 Python 脚本)。 - 固件打包工具:将编译后的代码与配置文件打包为可分发的固件格式(如 `.bin`、`.ota`)。 - 开发辅助工具: - 烧录工具:提供将固件烧录到硬件设备的工具 `tyutool`。 - 配置生成器:帮助生成设备配置文件。 - 代码格式化工具:确保代码风格一致的格式化脚本。 ## 部分临时文件和目录 - `.venv`:Python 虚拟环境安装路径。 - `.build`:编译输出目录,包含编译后的固件文件。 -
tos-guide.md1 2 3 4 5 6 7 8 9 10 11 12 13 14 15 16 17 18 19 20 21 22 23 24 25 26 27 28 29 30 31 32 33 34 35 36 37 38 39 40 41 42 43 44 45 46 47 48 49 50 51 52 53 54 55 56 57 58 59 60 61 62 63 64 65 66 67 68 69 70 71 72 73 74 75 76 77 78 79 80 81 82 83 84 85 86 87 88 89 90 91 92 93 94 95 96 97 98 99 100 101 102 103 104 105 106 107 108 109 110 111 112 113 114 115 116 117 118 119 120 121 122 123 124 125 126 127 128 129 130 131 132 133 134 135 136 137 138 139 140 141 142 143 144 145 146 147 148 149 150 151 152 153 154 155 156 157 158 159 160 161 162 163 164 165 166 167 168 169 170 171 172 173 174 175 176 177 178 179 180 181 182 183 184 185 186 187 188 189 190 191 192 193 194 195 196 197 198 199 200 201 202 203 204 205 206 207 208 209 210 211 212 213 214 215 216 217 218 219 220 221 222 223 224 225 226 227 228 229 230 231 232 233 234 235 236 237 238 239 240 241 242 243 244 245 246 247 248 249 250 251 252 253 254 255 256 257 258 259 260 261 262 263 264 265 266 267 268 269 270 271 272 273 274 275 276 277 278 279 280 281 282 283 284 285 286 287 288 289 290 291 292 293 294 295 296 297 298 299 300 301 302# tos.py 使用指南 ## 概述 本文主要介绍 `tos.py` 的工作原理和使用方法、各个子命令的行为解释,并针对可能出现的常见问题提供解决方法。 在完成激活 `TuyaOpen` 的操作后,也可以通过命令 `tos.py --help` 查看帮助信息。 ```bash ❯ tos.py --help Usage: tos.py [OPTIONS] COMMAND [ARGS]... Tuya Uart Tool. Options: -d, --debug Show debug message -h, --help Show this message and exit. Commands: version Show version. check Check the dependent tools. config Configuration file operation. build Build the project. clean Clean the project. flash Flash the firmware. monitor Display the device log. update Update TuyaOpen dependencies. ``` 使用命令字 `-d` 或 `--debug`,可以显示更多执行日志。 ```bash ❯ tos.py -d version [DEBUG]: open_logger init done. [INFO]: Running tos.py ... [INFO]: v1.3.0-23-g6bcb5aa ``` ## version `tos.py version` 所输出的版本号信息如下: ```bash ❯ tos.py version [INFO]: Running tos.py ... [INFO]: v1.3.0-23-g6bcb5aa ``` 显示内容实际是 `TuyaOpen` 仓库当前的 `tag-commit`,与命令 `git describe --tags` 输出一致,其中: - `v1.3.0`:最近的发布版本号。 - `23`:在 v1.3.0 的基础上有 23 个新的 Commit 提交。 - `g6bcb5aa`:`g` 为固定前缀,`6bcb5aa` 是当前 Commit 的缩写。 <details style="box-sizing: border-box; --tw-border-spacing-x: 0; --tw-border-spacing-y: 0; --tw-translate-x: 0; --tw-translate-y: 0; --tw-rotate: 0; --tw-skew-x: 0; --tw-skew-y: 0; --tw-scale-x: 1; --tw-scale-y: 1; --tw-pan-x: ; --tw-pan-y: ; --tw-pinch-zoom: ; --tw-scroll-snap-strictness: proximity; --tw-gradient-from-position: ; --tw-gradient-via-position: ; --tw-gradient-to-position: ; --tw-ordinal: ; --tw-slashed-zero: ; --tw-numeric-figure: ; --tw-numeric-spacing: ; --tw-numeric-fraction: ; --tw-ring-inset: ; --tw-ring-offset-width: 0px; --tw-ring-offset-color: #fff; --tw-ring-color: #3b82f680; --tw-ring-offset-shadow: 0 0 #0000; --tw-ring-shadow: 0 0 #0000; --tw-shadow: 0 0 #0000; --tw-shadow-colored: 0 0 #0000; --tw-blur: ; --tw-brightness: ; --tw-contrast: ; --tw-grayscale: ; --tw-hue-rotate: ; --tw-invert: ; --tw-saturate: ; --tw-sepia: ; --tw-drop-shadow: ; --tw-backdrop-blur: ; --tw-backdrop-brightness: ; --tw-backdrop-contrast: ; --tw-backdrop-grayscale: ; --tw-backdrop-hue-rotate: ; --tw-backdrop-invert: ; --tw-backdrop-opacity: ; --tw-backdrop-saturate: ; --tw-backdrop-sepia: ; --tw-contain-size: ; --tw-contain-layout: ; --tw-contain-paint: ; --tw-contain-style: ; color: rgb(227, 227, 227); font-family: "Open Sans", -apple-system, "system-ui", "Segoe UI", "Noto Sans", Helvetica, Arial, sans-serif, "Apple Color Emoji", "Segoe UI Emoji"; font-size: 16px; font-style: normal; font-variant-ligatures: normal; font-variant-caps: normal; font-weight: 400; letter-spacing: normal; orphans: 2; text-align: start; text-indent: 0px; text-transform: none; widows: 2; word-spacing: 0px; -webkit-text-stroke-width: 0px; white-space: normal; background-color: rgb(27, 27, 29); text-decoration-thickness: initial; text-decoration-style: initial; text-decoration-color: initial;"><summary style="box-sizing: border-box; --tw-border-spacing-x: 0; --tw-border-spacing-y: 0; --tw-translate-x: 0; --tw-translate-y: 0; --tw-rotate: 0; --tw-skew-x: 0; --tw-skew-y: 0; --tw-scale-x: 1; --tw-scale-y: 1; --tw-pan-x: ; --tw-pan-y: ; --tw-pinch-zoom: ; --tw-scroll-snap-strictness: proximity; --tw-gradient-from-position: ; --tw-gradient-via-position: ; --tw-gradient-to-position: ; --tw-ordinal: ; --tw-slashed-zero: ; --tw-numeric-figure: ; --tw-numeric-spacing: ; --tw-numeric-fraction: ; --tw-ring-inset: ; --tw-ring-offset-width: 0px; --tw-ring-offset-color: #fff; --tw-ring-color: #3b82f680; --tw-ring-offset-shadow: 0 0 #0000; --tw-ring-shadow: 0 0 #0000; --tw-shadow: 0 0 #0000; --tw-shadow-colored: 0 0 #0000; --tw-blur: ; --tw-brightness: ; --tw-contrast: ; --tw-grayscale: ; --tw-hue-rotate: ; --tw-invert: ; --tw-saturate: ; --tw-sepia: ; --tw-drop-shadow: ; --tw-backdrop-blur: ; --tw-backdrop-brightness: ; --tw-backdrop-contrast: ; --tw-backdrop-grayscale: ; --tw-backdrop-hue-rotate: ; --tw-backdrop-invert: ; --tw-backdrop-opacity: ; --tw-backdrop-saturate: ; --tw-backdrop-sepia: ; --tw-contain-size: ; --tw-contain-layout: ; --tw-contain-paint: ; --tw-contain-style: ;">出现 [Unknow version]:</summary><p style="box-sizing: border-box; margin: 0px 0px 20px; --tw-border-spacing-x: 0; --tw-border-spacing-y: 0; --tw-translate-x: 0; --tw-translate-y: 0; --tw-rotate: 0; --tw-skew-x: 0; --tw-skew-y: 0; --tw-scale-x: 1; --tw-scale-y: 1; --tw-pan-x: ; --tw-pan-y: ; --tw-pinch-zoom: ; --tw-scroll-snap-strictness: proximity; --tw-gradient-from-position: ; --tw-gradient-via-position: ; --tw-gradient-to-position: ; --tw-ordinal: ; --tw-slashed-zero: ; --tw-numeric-figure: ; --tw-numeric-spacing: ; --tw-numeric-fraction: ; --tw-ring-inset: ; --tw-ring-offset-width: 0px; --tw-ring-offset-color: #fff; --tw-ring-color: #3b82f680; --tw-ring-offset-shadow: 0 0 #0000; --tw-ring-shadow: 0 0 #0000; --tw-shadow: 0 0 #0000; --tw-shadow-colored: 0 0 #0000; --tw-blur: ; --tw-brightness: ; --tw-contrast: ; --tw-grayscale: ; --tw-hue-rotate: ; --tw-invert: ; --tw-saturate: ; --tw-sepia: ; --tw-drop-shadow: ; --tw-backdrop-blur: ; --tw-backdrop-brightness: ; --tw-backdrop-contrast: ; --tw-backdrop-grayscale: ; --tw-backdrop-hue-rotate: ; --tw-backdrop-invert: ; --tw-backdrop-opacity: ; --tw-backdrop-saturate: ; --tw-backdrop-sepia: ; --tw-contain-size: ; --tw-contain-layout: ; --tw-contain-paint: ; --tw-contain-style: ;"></p></details> ## check ```bash ❯ tos.py check [INFO]: Running tos.py ... [INFO]: [git] (2.43.0 >= 2.0.0) is ok. [INFO]: [cmake] (4.0.2 >= 3.28.0) is ok. [INFO]: [make] (4.3 >= 3.0.0) is ok. [INFO]: [ninja] (1.11.1 >= 1.6.0) is ok. [INFO]: Downloading submoudules ... [INFO]: [do subprocess]: cd /home/huatuo/work/open/TuyaOpen && git submodule update --init [INFO]: Download submoudules successfully. ``` `check` 命令会完成以下两个步骤的操作: 1. 检查 `TuyaOpen` 使用中所需的环境工具是否存在,并校验版本号。 2. 下载所需要的 `submodules`。 <details style="box-sizing: border-box; --tw-border-spacing-x: 0; --tw-border-spacing-y: 0; --tw-translate-x: 0; --tw-translate-y: 0; --tw-rotate: 0; --tw-skew-x: 0; --tw-skew-y: 0; --tw-scale-x: 1; --tw-scale-y: 1; --tw-pan-x: ; --tw-pan-y: ; --tw-pinch-zoom: ; --tw-scroll-snap-strictness: proximity; --tw-gradient-from-position: ; --tw-gradient-via-position: ; --tw-gradient-to-position: ; --tw-ordinal: ; --tw-slashed-zero: ; --tw-numeric-figure: ; --tw-numeric-spacing: ; --tw-numeric-fraction: ; --tw-ring-inset: ; --tw-ring-offset-width: 0px; --tw-ring-offset-color: #fff; --tw-ring-color: #3b82f680; --tw-ring-offset-shadow: 0 0 #0000; --tw-ring-shadow: 0 0 #0000; --tw-shadow: 0 0 #0000; --tw-shadow-colored: 0 0 #0000; --tw-blur: ; --tw-brightness: ; --tw-contrast: ; --tw-grayscale: ; --tw-hue-rotate: ; --tw-invert: ; --tw-saturate: ; --tw-sepia: ; --tw-drop-shadow: ; --tw-backdrop-blur: ; --tw-backdrop-brightness: ; --tw-backdrop-contrast: ; --tw-backdrop-grayscale: ; --tw-backdrop-hue-rotate: ; --tw-backdrop-invert: ; --tw-backdrop-opacity: ; --tw-backdrop-saturate: ; --tw-backdrop-sepia: ; --tw-contain-size: ; --tw-contain-layout: ; --tw-contain-paint: ; --tw-contain-style: ; color: rgb(227, 227, 227); font-family: "Open Sans", -apple-system, "system-ui", "Segoe UI", "Noto Sans", Helvetica, Arial, sans-serif, "Apple Color Emoji", "Segoe UI Emoji"; font-size: 16px; font-style: normal; font-variant-ligatures: normal; font-variant-caps: normal; font-weight: 400; letter-spacing: normal; orphans: 2; text-align: start; text-indent: 0px; text-transform: none; widows: 2; word-spacing: 0px; -webkit-text-stroke-width: 0px; white-space: normal; background-color: rgb(27, 27, 29); text-decoration-thickness: initial; text-decoration-style: initial; text-decoration-color: initial;"><summary style="box-sizing: border-box; --tw-border-spacing-x: 0; --tw-border-spacing-y: 0; --tw-translate-x: 0; --tw-translate-y: 0; --tw-rotate: 0; --tw-skew-x: 0; --tw-skew-y: 0; --tw-scale-x: 1; --tw-scale-y: 1; --tw-pan-x: ; --tw-pan-y: ; --tw-pinch-zoom: ; --tw-scroll-snap-strictness: proximity; --tw-gradient-from-position: ; --tw-gradient-via-position: ; --tw-gradient-to-position: ; --tw-ordinal: ; --tw-slashed-zero: ; --tw-numeric-figure: ; --tw-numeric-spacing: ; --tw-numeric-fraction: ; --tw-ring-inset: ; --tw-ring-offset-width: 0px; --tw-ring-offset-color: #fff; --tw-ring-color: #3b82f680; --tw-ring-offset-shadow: 0 0 #0000; --tw-ring-shadow: 0 0 #0000; --tw-shadow: 0 0 #0000; --tw-shadow-colored: 0 0 #0000; --tw-blur: ; --tw-brightness: ; --tw-contrast: ; --tw-grayscale: ; --tw-hue-rotate: ; --tw-invert: ; --tw-saturate: ; --tw-sepia: ; --tw-drop-shadow: ; --tw-backdrop-blur: ; --tw-backdrop-brightness: ; --tw-backdrop-contrast: ; --tw-backdrop-grayscale: ; --tw-backdrop-hue-rotate: ; --tw-backdrop-invert: ; --tw-backdrop-opacity: ; --tw-backdrop-saturate: ; --tw-backdrop-sepia: ; --tw-contain-size: ; --tw-contain-layout: ; --tw-contain-paint: ; --tw-contain-style: ;">Check 过程中出现 Error:</summary><ul style="box-sizing: border-box; margin: 0px 0px 16px; padding-left: 32px; --tw-border-spacing-x: 0; --tw-border-spacing-y: 0; --tw-translate-x: 0; --tw-translate-y: 0; --tw-rotate: 0; --tw-skew-x: 0; --tw-skew-y: 0; --tw-scale-x: 1; --tw-scale-y: 1; --tw-pan-x: ; --tw-pan-y: ; --tw-pinch-zoom: ; --tw-scroll-snap-strictness: proximity; --tw-gradient-from-position: ; --tw-gradient-via-position: ; --tw-gradient-to-position: ; --tw-ordinal: ; --tw-slashed-zero: ; --tw-numeric-figure: ; --tw-numeric-spacing: ; --tw-numeric-fraction: ; --tw-ring-inset: ; --tw-ring-offset-width: 0px; --tw-ring-offset-color: #fff; --tw-ring-color: #3b82f680; --tw-ring-offset-shadow: 0 0 #0000; --tw-ring-shadow: 0 0 #0000; --tw-shadow: 0 0 #0000; --tw-shadow-colored: 0 0 #0000; --tw-blur: ; --tw-brightness: ; --tw-contrast: ; --tw-grayscale: ; --tw-hue-rotate: ; --tw-invert: ; --tw-saturate: ; --tw-sepia: ; --tw-drop-shadow: ; --tw-backdrop-blur: ; --tw-backdrop-brightness: ; --tw-backdrop-contrast: ; --tw-backdrop-grayscale: ; --tw-backdrop-hue-rotate: ; --tw-backdrop-invert: ; --tw-backdrop-opacity: ; --tw-backdrop-saturate: ; --tw-backdrop-sepia: ; --tw-contain-size: ; --tw-contain-layout: ; --tw-contain-paint: ; --tw-contain-style: ;"><li style="box-sizing: border-box; overflow-wrap: break-word; --tw-border-spacing-x: 0; --tw-border-spacing-y: 0; --tw-translate-x: 0; --tw-translate-y: 0; --tw-rotate: 0; --tw-skew-x: 0; --tw-skew-y: 0; --tw-scale-x: 1; --tw-scale-y: 1; --tw-pan-x: ; --tw-pan-y: ; --tw-pinch-zoom: ; --tw-scroll-snap-strictness: proximity; --tw-gradient-from-position: ; --tw-gradient-via-position: ; --tw-gradient-to-position: ; --tw-ordinal: ; --tw-slashed-zero: ; --tw-numeric-figure: ; --tw-numeric-spacing: ; --tw-numeric-fraction: ; --tw-ring-inset: ; --tw-ring-offset-width: 0px; --tw-ring-offset-color: #fff; --tw-ring-color: #3b82f680; --tw-ring-offset-shadow: 0 0 #0000; --tw-ring-shadow: 0 0 #0000; --tw-shadow: 0 0 #0000; --tw-shadow-colored: 0 0 #0000; --tw-blur: ; --tw-brightness: ; --tw-contrast: ; --tw-grayscale: ; --tw-hue-rotate: ; --tw-invert: ; --tw-saturate: ; --tw-sepia: ; --tw-drop-shadow: ; --tw-backdrop-blur: ; --tw-backdrop-brightness: ; --tw-backdrop-contrast: ; --tw-backdrop-grayscale: ; --tw-backdrop-hue-rotate: ; --tw-backdrop-invert: ; --tw-backdrop-opacity: ; --tw-backdrop-saturate: ; --tw-backdrop-sepia: ; --tw-contain-size: ; --tw-contain-layout: ; --tw-contain-paint: ; --tw-contain-style: ;"><p style="box-sizing: border-box; margin: 16px 0px 20px; --tw-border-spacing-x: 0; --tw-border-spacing-y: 0; --tw-translate-x: 0; --tw-translate-y: 0; --tw-rotate: 0; --tw-skew-x: 0; --tw-skew-y: 0; --tw-scale-x: 1; --tw-scale-y: 1; --tw-pan-x: ; --tw-pan-y: ; --tw-pinch-zoom: ; --tw-scroll-snap-strictness: proximity; --tw-gradient-from-position: ; --tw-gradient-via-position: ; --tw-gradient-to-position: ; --tw-ordinal: ; --tw-slashed-zero: ; --tw-numeric-figure: ; --tw-numeric-spacing: ; --tw-numeric-fraction: ; --tw-ring-inset: ; --tw-ring-offset-width: 0px; --tw-ring-offset-color: #fff; --tw-ring-color: #3b82f680; --tw-ring-offset-shadow: 0 0 #0000; --tw-ring-shadow: 0 0 #0000; --tw-shadow: 0 0 #0000; --tw-shadow-colored: 0 0 #0000; --tw-blur: ; --tw-brightness: ; --tw-contrast: ; --tw-grayscale: ; --tw-hue-rotate: ; --tw-invert: ; --tw-saturate: ; --tw-sepia: ; --tw-drop-shadow: ; --tw-backdrop-blur: ; --tw-backdrop-brightness: ; --tw-backdrop-contrast: ; --tw-backdrop-grayscale: ; --tw-backdrop-hue-rotate: ; --tw-backdrop-invert: ; --tw-backdrop-opacity: ; --tw-backdrop-saturate: ; --tw-backdrop-sepia: ; --tw-contain-size: ; --tw-contain-layout: ; --tw-contain-paint: ; --tw-contain-style: ;"></p></li><li style="box-sizing: border-box; overflow-wrap: break-word; margin-top: 4px; --tw-border-spacing-x: 0; --tw-border-spacing-y: 0; --tw-translate-x: 0; --tw-translate-y: 0; --tw-rotate: 0; --tw-skew-x: 0; --tw-skew-y: 0; --tw-scale-x: 1; --tw-scale-y: 1; --tw-pan-x: ; --tw-pan-y: ; --tw-pinch-zoom: ; --tw-scroll-snap-strictness: proximity; --tw-gradient-from-position: ; --tw-gradient-via-position: ; --tw-gradient-to-position: ; --tw-ordinal: ; --tw-slashed-zero: ; --tw-numeric-figure: ; --tw-numeric-spacing: ; --tw-numeric-fraction: ; --tw-ring-inset: ; --tw-ring-offset-width: 0px; --tw-ring-offset-color: #fff; --tw-ring-color: #3b82f680; --tw-ring-offset-shadow: 0 0 #0000; --tw-ring-shadow: 0 0 #0000; --tw-shadow: 0 0 #0000; --tw-shadow-colored: 0 0 #0000; --tw-blur: ; --tw-brightness: ; --tw-contrast: ; --tw-grayscale: ; --tw-hue-rotate: ; --tw-invert: ; --tw-saturate: ; --tw-sepia: ; --tw-drop-shadow: ; --tw-backdrop-blur: ; --tw-backdrop-brightness: ; --tw-backdrop-contrast: ; --tw-backdrop-grayscale: ; --tw-backdrop-hue-rotate: ; --tw-backdrop-invert: ; --tw-backdrop-opacity: ; --tw-backdrop-saturate: ; --tw-backdrop-sepia: ; --tw-contain-size: ; --tw-contain-layout: ; --tw-contain-paint: ; --tw-contain-style: ;"><p style="box-sizing: border-box; margin: 16px 0px 20px; --tw-border-spacing-x: 0; --tw-border-spacing-y: 0; --tw-translate-x: 0; --tw-translate-y: 0; --tw-rotate: 0; --tw-skew-x: 0; --tw-skew-y: 0; --tw-scale-x: 1; --tw-scale-y: 1; --tw-pan-x: ; --tw-pan-y: ; --tw-pinch-zoom: ; --tw-scroll-snap-strictness: proximity; --tw-gradient-from-position: ; --tw-gradient-via-position: ; --tw-gradient-to-position: ; --tw-ordinal: ; --tw-slashed-zero: ; --tw-numeric-figure: ; --tw-numeric-spacing: ; --tw-numeric-fraction: ; --tw-ring-inset: ; --tw-ring-offset-width: 0px; --tw-ring-offset-color: #fff; --tw-ring-color: #3b82f680; --tw-ring-offset-shadow: 0 0 #0000; --tw-ring-shadow: 0 0 #0000; --tw-shadow: 0 0 #0000; --tw-shadow-colored: 0 0 #0000; --tw-blur: ; --tw-brightness: ; --tw-contrast: ; --tw-grayscale: ; --tw-hue-rotate: ; --tw-invert: ; --tw-saturate: ; --tw-sepia: ; --tw-drop-shadow: ; --tw-backdrop-blur: ; --tw-backdrop-brightness: ; --tw-backdrop-contrast: ; --tw-backdrop-grayscale: ; --tw-backdrop-hue-rotate: ; --tw-backdrop-invert: ; --tw-backdrop-opacity: ; --tw-backdrop-saturate: ; --tw-backdrop-sepia: ; --tw-contain-size: ; --tw-contain-layout: ; --tw-contain-paint: ; --tw-contain-style: ;"><code style="box-sizing: border-box; background-color: rgba(255, 255, 255, 0.1); border-radius: 6.4px; font-family: SFMono-Regular, Menlo, Monaco, Consolas, "Liberation Mono", "Courier New", monospace; font-size: 14.4px; padding: 1.6px; vertical-align: middle; border: 0.1rem solid rgba(0, 0, 0, 0.1); --tw-border-spacing-x: 0; --tw-border-spacing-y: 0; --tw-translate-x: 0; --tw-translate-y: 0; --tw-rotate: 0; --tw-skew-x: 0; --tw-skew-y: 0; --tw-scale-x: 1; --tw-scale-y: 1; --tw-pan-x: ; --tw-pan-y: ; --tw-pinch-zoom: ; --tw-scroll-snap-strictness: proximity; --tw-gradient-from-position: ; --tw-gradient-via-position: ; --tw-gradient-to-position: ; --tw-ordinal: ; --tw-slashed-zero: ; --tw-numeric-figure: ; --tw-numeric-spacing: ; --tw-numeric-fraction: ; --tw-ring-inset: ; --tw-ring-offset-width: 0px; --tw-ring-offset-color: #fff; --tw-ring-color: #3b82f680; --tw-ring-offset-shadow: 0 0 #0000; --tw-ring-shadow: 0 0 #0000; --tw-shadow: 0 0 #0000; --tw-shadow-colored: 0 0 #0000; --tw-blur: ; --tw-brightness: ; --tw-contrast: ; --tw-grayscale: ; --tw-hue-rotate: ; --tw-invert: ; --tw-saturate: ; --tw-sepia: ; --tw-drop-shadow: ; --tw-backdrop-blur: ; --tw-backdrop-brightness: ; --tw-backdrop-contrast: ; --tw-backdrop-grayscale: ; --tw-backdrop-hue-rotate: ; --tw-backdrop-invert: ; --tw-backdrop-opacity: ; --tw-backdrop-saturate: ; --tw-backdrop-sepia: ; --tw-contain-size: ; --tw-contain-layout: ; --tw-contain-paint: ; --tw-contain-style: ;"></code><code style="box-sizing: border-box; background-color: rgba(255, 255, 255, 0.1); border-radius: 6.4px; font-family: SFMono-Regular, Menlo, Monaco, Consolas, "Liberation Mono", "Courier New", monospace; font-size: 14.4px; padding: 1.6px; vertical-align: middle; border: 0.1rem solid rgba(0, 0, 0, 0.1); --tw-border-spacing-x: 0; --tw-border-spacing-y: 0; --tw-translate-x: 0; --tw-translate-y: 0; --tw-rotate: 0; --tw-skew-x: 0; --tw-skew-y: 0; --tw-scale-x: 1; --tw-scale-y: 1; --tw-pan-x: ; --tw-pan-y: ; --tw-pinch-zoom: ; --tw-scroll-snap-strictness: proximity; --tw-gradient-from-position: ; --tw-gradient-via-position: ; --tw-gradient-to-position: ; --tw-ordinal: ; --tw-slashed-zero: ; --tw-numeric-figure: ; --tw-numeric-spacing: ; --tw-numeric-fraction: ; --tw-ring-inset: ; --tw-ring-offset-width: 0px; --tw-ring-offset-color: #fff; --tw-ring-color: #3b82f680; --tw-ring-offset-shadow: 0 0 #0000; --tw-ring-shadow: 0 0 #0000; --tw-shadow: 0 0 #0000; --tw-shadow-colored: 0 0 #0000; --tw-blur: ; --tw-brightness: ; --tw-contrast: ; --tw-grayscale: ; --tw-hue-rotate: ; --tw-invert: ; --tw-saturate: ; --tw-sepia: ; --tw-drop-shadow: ; --tw-backdrop-blur: ; --tw-backdrop-brightness: ; --tw-backdrop-contrast: ; --tw-backdrop-grayscale: ; --tw-backdrop-hue-rotate: ; --tw-backdrop-invert: ; --tw-backdrop-opacity: ; --tw-backdrop-saturate: ; --tw-backdrop-sepia: ; --tw-contain-size: ; --tw-contain-layout: ; --tw-contain-paint: ; --tw-contain-style: ;"></code><code style="box-sizing: border-box; background-color: rgba(255, 255, 255, 0.1); border-radius: 6.4px; font-family: SFMono-Regular, Menlo, Monaco, Consolas, "Liberation Mono", "Courier New", monospace; font-size: 14.4px; padding: 1.6px; vertical-align: middle; border: 0.1rem solid rgba(0, 0, 0, 0.1); --tw-border-spacing-x: 0; --tw-border-spacing-y: 0; --tw-translate-x: 0; --tw-translate-y: 0; --tw-rotate: 0; --tw-skew-x: 0; --tw-skew-y: 0; --tw-scale-x: 1; --tw-scale-y: 1; --tw-pan-x: ; --tw-pan-y: ; --tw-pinch-zoom: ; --tw-scroll-snap-strictness: proximity; --tw-gradient-from-position: ; --tw-gradient-via-position: ; --tw-gradient-to-position: ; --tw-ordinal: ; --tw-slashed-zero: ; --tw-numeric-figure: ; --tw-numeric-spacing: ; --tw-numeric-fraction: ; --tw-ring-inset: ; --tw-ring-offset-width: 0px; --tw-ring-offset-color: #fff; --tw-ring-color: #3b82f680; --tw-ring-offset-shadow: 0 0 #0000; --tw-ring-shadow: 0 0 #0000; --tw-shadow: 0 0 #0000; --tw-shadow-colored: 0 0 #0000; --tw-blur: ; --tw-brightness: ; --tw-contrast: ; --tw-grayscale: ; --tw-hue-rotate: ; --tw-invert: ; --tw-saturate: ; --tw-sepia: ; --tw-drop-shadow: ; --tw-backdrop-blur: ; --tw-backdrop-brightness: ; --tw-backdrop-contrast: ; --tw-backdrop-grayscale: ; --tw-backdrop-hue-rotate: ; --tw-backdrop-invert: ; --tw-backdrop-opacity: ; --tw-backdrop-saturate: ; --tw-backdrop-sepia: ; --tw-contain-size: ; --tw-contain-layout: ; --tw-contain-paint: ; --tw-contain-style: ;"></code></p></li></ul></details> ## config ```bash ❯ tos.py config -h Usage: tos.py config [OPTIONS] COMMAND [ARGS]... Configuration file operation. Commands: choice Choice config file. menu Menuconfig. save Save minimal config. ``` ### config choice 在项目目录中,执行命令 `tos.py config choice`。 会展示当前项目所支持的所有固化配置,可直接使用,被选择的配置会同步到项目路径下的 [app_default.config](https://tuyaopen.ai/docs/project-walkthrough#app_defaultconfig) 文件。 ```bash ❯ tos.py config choice [INFO]: Fullclean success. -------------------- 1. DNESP32S3_BOX.config 2. XINGZHI_Cube_0_96OLED_WIFI.config 3. WAVESHARE_ESP32S3_TOUCH_AMOLED_1_8.config 4. ESP32S3_BREAD_COMPACT_WIFI.config 5. TUYA_T5AI_EVB.config 6. DNESP32S3.config 7. TUYA_T5AI_BOARD_EYES.config 8. TUYA_T5AI_MINI_LCD_1.3.config 9. T5AI_MOJI_1.28.config 10. TUYA_T5AI_BOARD_LCD_3.5.config -------------------- Input "q" to exit. Choice config file: ``` 固化配置的来源有两个: - 优先使用项目路径下 `config` 目录中的配置文件(如 `your_chat_bot`)。 - 若以上来源不存在,使用 `TuyaOpen/boards` 中提供的配置文件(如 `switch_demo`)。 该操作可能会改变所使用的工具链,所以 `config` 操作会先执行一次深度清理。 当 `config` 目录存在时,并不会显示 `boards` 中的配置文件。 若只想显示 `boards` 中的配置,可添加命令字 `config -d`。 ### config menu `menu` 命令会打开可视化配置界面。 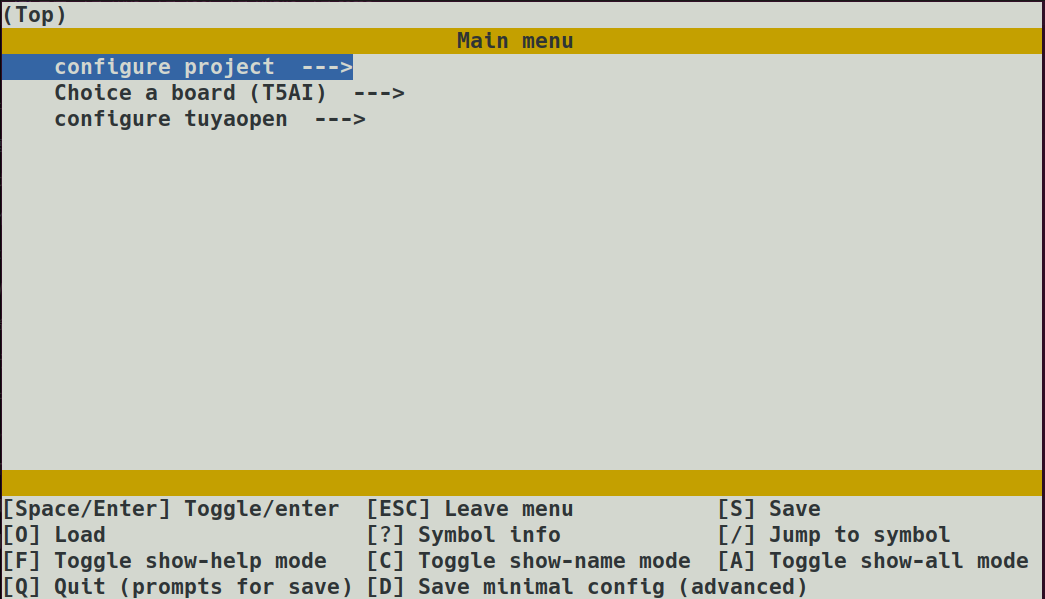 使用者可以根据项目需求修改配置选项,保存后会同步修改 [app_default.config](https://tuyaopen.ai/docs/project-walkthrough#app_defaultconfig) 文件。 该操作可能会改变所使用的工具链,所以`menu`操作,会先执行一次深度清理。 修改配置会导致项目功能发生变化,甚至编译失败。可以询问技术支持,或者使用 `choice` 命令重新选择配置。 ### config save `save` 会将当前项目所使用的配置保存为固化配置,方便以后使用。 具体操作为将 [app_default.config](https://tuyaopen.ai/docs/project-walkthrough#app_defaultconfig) 文件重新命名后保存到 `config` 目录中。 ```bash ❯ tos.py config save [INFO]: Running tos.py ... Input save config name: ``` `save` 操作针对通过 `menu` 修改过固化配置的场景使用。 ## build 编译项目,生成可执行文件。 ```bash ❯ tos.py build ... [INFO]: ****************************** [INFO]: /xxx/TuyaOpen/apps/tuya_cloud/switch_demo/.build/bin/switch_demo_QIO_1.0.0.bin [INFO]: ****************************** [INFO]: ******* Build Success ******** [INFO]: ****************************** ``` 具体执行过程中,会完成如下操作: 1. 下载项目所选择的工具链仓库到 `platform` 目录中。 2. 执行工具链的 `prepare` 操作。 3. 创建编译目录 `.build`,并解析 `CMakeLists.txt` 文件。 4. 执行编译命令 `ninja build`。 5. 将产物放到路径 `.build/bin`。 若需参考详细的编译日志,可使用命令字 `build -v`。 ## clean 清理编译缓存。 使用命令字 `clean -f` 深度清理。在 `ninja clean` 执行结束后,会删除编译目录 `.build`。 ## flash 烧录可执行文件到设备中。 使用工具 `tyutool_cli` 完成烧录,如果没有会自动下载。 根据项目配置,会自动调整烧录方式,也可以通过命令字手动设置。 ```bash ❯ tos.py flash -h Usage: tos.py flash [OPTIONS] Flash the firmware. Options: -d, --debug Show flash debug message. -p, --port TEXT Target port. -b, --baud INTEGER Uart baud rate. -h, --help Show this message and exit. ``` `tyutool_cli` 工具存放在目录 `TuyaOpen/tools/tyutool` 中。 对于 Linux/Mac 用户,需要开启串口使用权限,执行命令 `sudo usermod -aG dialout $USER`,并重启系统。 ## monitor 使用工具 `tyutool_cli` 显示串口日志。 根据项目配置,自动调整日志参数,也可以通过命令字手动设置。 ```bash ❯ tos.py monitor -h Usage: tos.py monitor [OPTIONS] Display the device log. Options: -p, --port TEXT Target port. -b, --baud INTEGER Uart baud rate. -h, --help Show this message and exit. ``` 同时,也可以使用 `monitor` 功能写入授权码,参考:[设备授权](https://tuyaopen.ai/docs/quick-start/equipment-authorization)。 如需退出日志查看,按键 `Ctrl + C`,并回车。 ```bash ^C[INFO]: Press "Entry" ... [INFO]: Monitor exit. ``` ## update 根据 `TuyaOpen` 的依赖配置文件,将相关依赖切换到指定 `commit`。 若使用 `git pull` 或 `git checkout` 更新了 `TuyaOpen` 主仓库,可使用 `update` 命令,自动更新相关依赖。 工具链依赖关系记录在文件 `TuyaOpen/platform/platform_config.yaml` 中。 ## new ### new project 该命令用于快速创建一个新的用户应用程序项目。 执行过程如下: 1. 询问项目名称:提示您输入新项目的名称(例如`my_app`)。 2. 选择框架:可以通过 `--framework` 参数选择一个项目模板。从代码看,目前支持 base(基础模板)和 arduino 两种。默认是 base。 3. 复制模板: 1. 首先,会从 `tools/app_template/` 目录中检索到对应的框架模板。 2. 然后,将整个模板目录完整地复制到当前目录下,并重命名为您输入的项目名。 ### new platform 该命令的具体使用方法,请参考 **[new platform](https://tuyaopen.ai/docs/new-hardware/new-platform)**。 ## 常见问题 ### 在 `Windows` 中执行 `config menu` 命令,方向键有失效的可能性? 这是终端模拟器兼容性问题所导致,您可以尝试以下操作: - 在 `cmd` 和 `powershell` 中选择可用的终端。 - 使用按键 **h(⬅️)、j(⬇️)、k(⬆️)、l(➡️)** 进行方向控制操作。 ### check 报错 1. 依赖工具未安装或版本过低 - 请安装或升级对应的工具 2. submodules 下载失败 - 请尝试在 `TuyaOpen` 根目录执行 `git submodule update --init` ### could not lock config file 若出现如下报错 ```bash [WARNING]: Set repo mirro error: Cmd('git') failed due to: exit code(255) cmdline: git config --global --unset url.https://gitee.com/tuya-open/FlashDB.insteadOf stderr: 'error: could not lock config file /home/huatuo/.gitconfig: File exists' [WARNING]: Set repo mirro error: Cmd('git') failed due to: exit code(255) cmdline: git config --global --unset url.https://gitee.com/tuya-open/littlefs.insteadOf stderr: 'error: could not lock config file /home/huatuo/.gitconfig: File exists' ``` 可手动删除文件 `~/.gitconfig.lock`
3.2. 线:设置开发规则
以下规则是在方案探索中总结的一些经验,目的是为了让 LLM 能够更好的完成开发任务,可以持续迭代完善,使用时,不同的开发工具配置成自己可识别的 Rules 即可:
|
|
3.3. 点:明确开发任务
提示词需要遵循“分析需求”、“拆分任务”、“清晰描述”、“持续迭代”等原则,以下是一个开发任务提示词示例:
|
|
4. 效果演示
4.1 工具
- IDE:VSCode
- AI插件:Kilo Code
- 模型:DeepSeek v3.2
- 上下文:128k
4.2 开发过程
4.3 效果展示
4.4. 小结
同步测试了Cursor、Cline等工具和模型,不论使用哪种工具,哪个模型,都有可能无法在一次开发任务中 100%完成用户需求。所以将固件烧录到开发板后,用户需运行测试,并将新需求反馈给 AI 工具,如“没有重力感应”、“游戏结束后没有弹出分数统计”等,通过多轮迭代的方式直到实现用户需求。
5. 方案改进
上述内容仅为嵌入式开发场景 Vibe Coding 解决方案的初步探索,在实践中还有很多问题需要优化和改进,以下仅列出部分重要项:
-
建立
app_default.config配置文件说明文档: 影响级别高。开发套件和官方文档中都没有关于app_default.config配置文件的完整说明,示例项目中也没有各个配置项的相关注释。这就导致 AI 无法正确生成配置文件,需要查看大量源文件了解配置项用途,耽误时间。所以在该方案中,我将以下内容写到了的开发规则中,通过 Hard code 方式来约束 AI,但这显然不是一个好办法。解决办法是在开发套件项目中有一个关于app_default.config配置文件的详细说明文档。1使用35565LCD,需要在`app_default.config`设置 `CONFIG_TUYA_T5AI_BOARD_EX_MODULE_35565LCD=y` -
建立
CMakeLists.txt说明文档: 影响级别高。同上,缺少CMakeLists.txt的注释和说明,让 AI 在编译项目时容易出错,有时 AI 工具会查看apps目录下的示例项目来了解CMakeLists.txt的使用方式。但由于新项目和示例项目不在一个目录下,CMakeLists.txt中的动态库的加载方式也不同,就容易产生错误,有时 AI 为了解决问题会强制把新项目移动到apps目录下,这也是为什么在开发规则中会有以下内容:1 2- 新项目放在projects目录下,如果没有请创建 - 按需查看`apps`和`examples`目录下的示例项目和配置,如`CMakeLists.txt`和`app_default.config`,但注意他们的目录和新项目的目录不一样,需要注意`CMakeLists.txt`中引用库的路径问题 -
重构配置、编译文档: 影响级别中。在官方文档中,项目编译前需要通过命令
python3 tos.py config choice或python3 tos.py config menu来配置项目。相关内容记录在project-compilation.md中。这会在 Terminal 中弹出操作界面,让用户手动来完成配置。
而 Vibe Coding 探索的场景式尽量让用户少去手动操作,默认用户完全不懂如何配置。所以需要建立
app_default.config配置文件说明文档,让 AI 自动创建配置文件,并且需要告诉 AI 不要执行上述的配置命令。所以在开发规则中包含了以下内容,这依然不是一个好方法。可以重构配置、编译文档project-compilation.md,针对 Vibe Coding 场景写一份配置、编译的说明文档。1 2- 注意不要执行`python3 tos.py config`命令和子命令,如`python3 tos.py config choice`,否则会覆盖原有的`app_default.config`文件,你可以直接查看并修改`app_default.config`文件 - 编译前需要执行`tos.py clean -f`命令清理build目录,再编译,以防缓存干扰 -
尝试其他方案: 本文探索了Agent+本地项目+上下文工程(面-线-点)的方式来实现需求。后续可以探索其他方案的可行性,如通过 Agent+MCP+Context7(RAG)的方案,但这种方案对信息(文档)的提炼要求应该会更高。
